# Manage Studies
This user guide explains how to manage study definitions in the OpenStudyBuilder application. This is done on the Studies menu selecting Study List or Manage Studies.
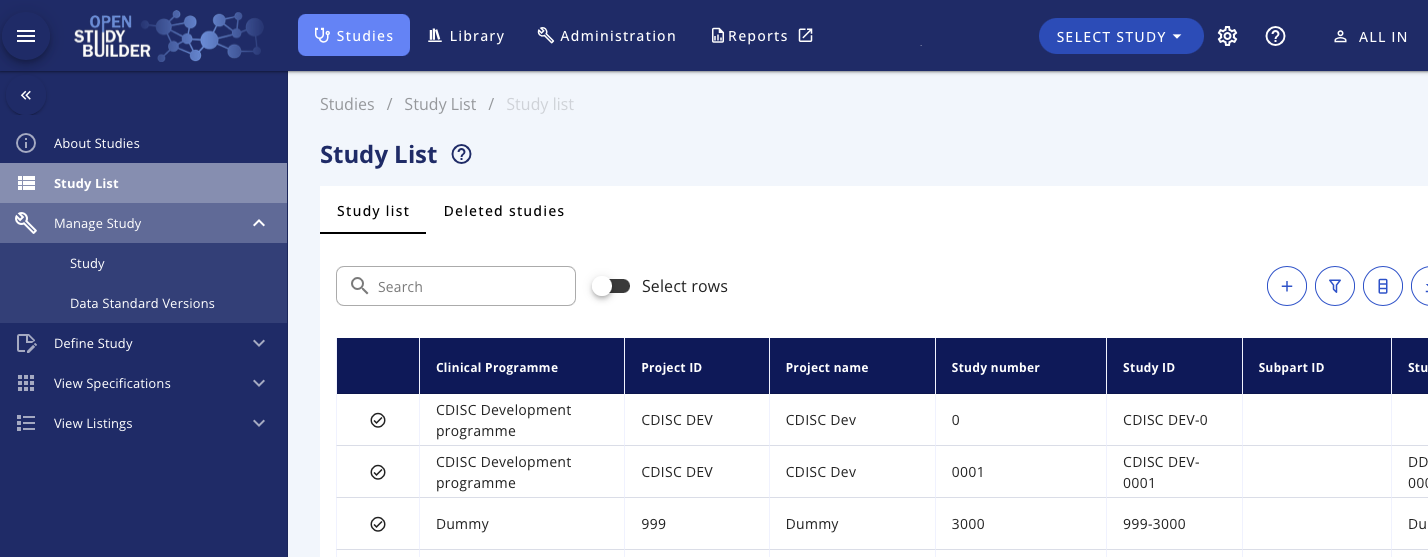
- On the Study List menu you can search and select studies as well as add new study definitions.
- On the Manage Studies menu you can maintain the core attributes for a study, study status and versioning, maintain relationship to sub-parts (for protocols holding multiple sub-studies) and maintain relationship between study versions and protocol document versions.
# Search and Select Study
You can select a study from the SELECT STUDY button in the top banner or the side menu Study List. From the Study List menu you can search among the studies already created or add a new study.
# Delete Study
You can delete a Study from the menu Manage Studies --> Study. A prerequisite is that the study has not previously been Locked.
This is a 'soft' deletion, when the study is deleted it will no longer be part of the study list and identifiers will no longer be part of constraint checks. The deleted studies will then be available on the menu Manage Studies --> Study List on the tab Deleted Studies.
# Maintain Core Study Attributes
You can maintain the core attributes for a study from the menu Manage Studies --> Study on the tab Study Core Attributes.
This cover the relationship to clinical programme and project, study number (will be linked to the Study ID) and the Study Acronym.
Note the History displayed from this page is actually the overall history for the study definition.
# Maintain Study Status and Versioning
This section will explain how we work with versioning, status, state, and instances in OpenStudyBuilder.
Study State refer to the state a study is in. The study definition data can be referenced in specific versioned study definition instances as well as general references to those. A study definition instance has a specific status. All these terms will be described in this guide.
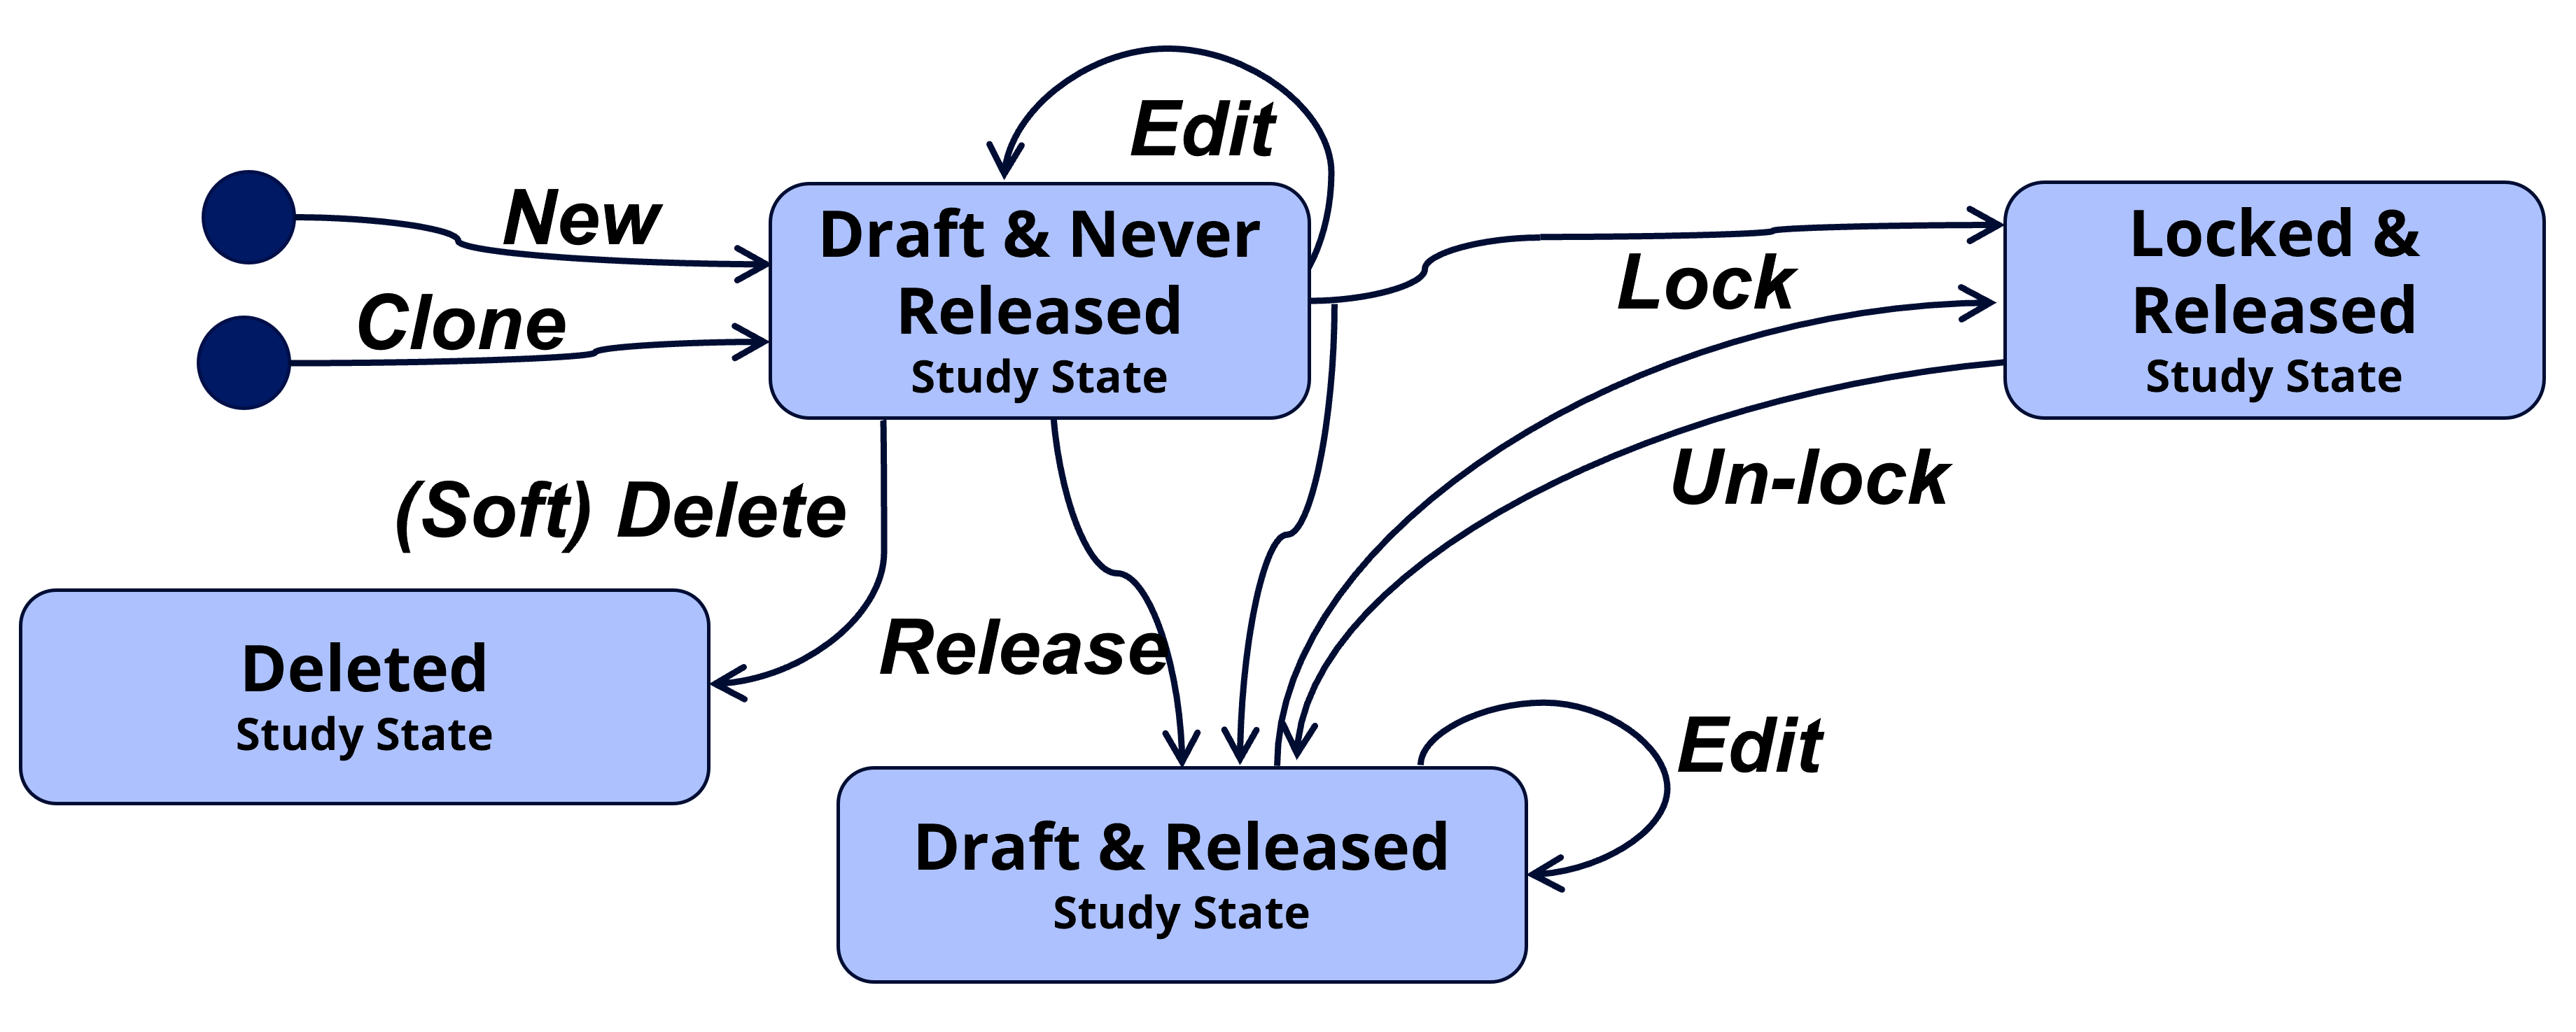
A study definition can at a point in time be in one of the following states:
- Draft and Never Released, the study definition can be edited, deleted, released into minor version, or locked into major version. No persistent study definition instances exist yet.
- Draft and Released, the study definition can be edited, released into minor version or locked into major version. Persistent study definition instances do exist.
- Locked and Released, the study definition cannot be edited, it can be unlocked into draft.
- Deleted, the study definition is deleted and can no longer be edited. Attribute values will no longer be part of uniqueness checks. The deletion is a soft deletion, audit trail still exists, and deleted studies can be listed on a dedicated tab for deleted studies so audit trail can be displayed.
This is all controlled by several actions, bringing the study into different states – illustrated in below state-action diagram and described in the following section.
| Action | Description |
|---|---|
| New (Add) | A study is created from scratch or as a clone from an existing study. This will bring the study into the state “Draft and Never Released”. |
| Edit | A study can be edited when the study status is in Draft. The editing will not change the state, it will continue to be either “Draft and Never Released” or “Draft and Released”. |
| Release | This will create a stable persistent study instance that can be referred to for downstream usage, as a data snapshot reference in the repository. A concurrent minor version number will automatically be assigned (0.1, 0.2, …, 1.1, 1.2, …). The study will continue to be in ‘Draft’ status but will change state from “Draft and Never Released” to “Draft and Released”. Release is like check-in in a document management system or a commit and push in a Git repository. |
| Delete | Study can only be deleted if never locked. When the study is deleted, it will be removed from the list of studies and not take part in e.g., uniqueness checks. But technically it is a soft delete, and the study and audit trail can be seen from the tab listing deleted studies. |
| Lock | This will create a versioned stable persistent study instance that can be referred to from downstream usage, as a data snapshot reference in the repository. The study will change status to ‘Locked’ and can no longer be edited. To continue to edit, an un-lock action must be done starting up a new version. Vision is to add a related study milestone (e.g., ‘Final protocol’) and a set of metadata rules and consistency checks must then be fulfilled to lock the study for a specific study milestone. This is however not yet implemented and initially the simple rule we have defined is a study number must be assigned and a study title defined. A concurrent major version number will automatically be assigned (1.0, 2.0, 3.0, …). The locking process will also make a study release instance to ensure the latest release instance never is older than the latest locked instance. Lock and Release is like creating a final approved version in a document management system or a merging a pull request into main in a Git repository. |
| Un-lock | This will bring the study back into the ‘Draft’ status where the study again can be edited. As the study always will implicitly be Released when Locked this will bring the study to the “Draft and Released” state. |
# Release or lock Study
You can release or lock a study definition from the Manage Studies --> Study menu on the tab Study Status.
- Select the Release study or Lock study icon in the upper right corner on the Study Status page.
- Select 'Specify reason for releasing or locking the study'
- If you select 'Other' as the reason then enter a description for the other reason for locking or releasing.
- You can optionally define relationship to the 'Protocol header version' by entering the main and minor version number.
- If you select 'Final Protocol' as the reason for releasing or locking a study, then you must specify the major version number for the protocol (the minor version number will be set to 0).
- You should enter a short summary 'Change description' of the changes in this study definition version compared to the previous version (even this field is optional in the system).
- Select the 'Release Study' or 'Lock Study' button.
- Note, study number and study title is required to be filled out for a study to be locked.
# Unlock Study
You can unlock a study definition when the study is in locked status from the Manage Studies --> Study menu on the tab Study Status.
- Select the Unlock study icon in the upper right corner on the Study Status page.
- You will get a warning notification if you unlock a study that have previously been locked for a final protocol document version.
- Select 'Specify reason for unlocking the study'
- If you select 'Other' as the reason then enter a description for the other reason for unlocking.
- Select the 'Unlock' button.
# Protocol Versions
You can see the major protocol document versions and the latest related study definition version from the menu Manage Studies --> Study on the tab Protocol Version.
NOTE: This is simply a distinct list of the major protocol document versions that a study definition has been linked to. It will not reflect any protocol document versions that may exist that have not been linked to a study definition version.
# Study Definition Versions
The different status for study definitions instances and versioned snapshots enables these can be used for querying study definitions data from OpenStudyBuilder. A study definition instance can have the following status:
- Draft, refer to the current instance that can be edited.
- Released, refer to a minor version of a stable instance (snapshot) for downstream testing and review.
- Locked, refer to a major version of a stable instance (snapshot) for downstream usage in final deliverables. As this is a major version several constraint checks must be fulfilled for a study definition instance can be locked. Both a locked version instance and a released instance is made when the study is locked to avoid the latest released is older than the latest locked.
Some of these study definition instances are general, and some refer to the specific released minor versions or locked major versions of a study definition instance. Each are described in the following table.
| Study Definition Instance | Description |
|---|---|
| Latest | Refer to the latest study definition instance in status Draft when the study is in Draft or the latest Locked instance when the study is Locked. This is used by the OpenStudyBuilder as the default study definition instance when displaying study data. |
| Draft | Refer to the current draft study definition instance when the study is in Draft (i.e. it does not exist when the study state is Locked and Released). Note this study instance is not persistent and will change whenever updates are being made to a study definition. |
| Latest Released | Refer to the latest released study instance. |
| Released sub-version | Refer to a specific released study definition instance done at a specific point in time and assigned a sub version number |
| Latest Locked | Refer to the latest locked study definition instance. |
| Locked version | Refer to a specific locked study definition instance done at a specific point in time and assigned a main version number. |
These study definition instances should be used in different ways. For final deliverables (like a final protocol version) a locked version should always be used. For testing e.g., SDTM generation a stable released study definition instance can be used. The benefit here is it is stable so will not have instance changes as the study definition is being updated, this makes it simpler to test and debug the programs using the metadata.
For general queries and exploration of study definitions metadata the general lates study definition instance should be used, where you always see the lates metadata independent of status.
# Study Subparts
Study Subparts are needed, whenever a single protocol is including multiple sub-studies. This could be the case with a single dose and multi dose included in one, single protocol.
For OpenStudyBuilder to support this need, the study subparts are available.
Usually it has been decided at an early stage, when a study should have multiple parts and it can make sense to create all parts at when setting up the study. It is also possible to create the subparts later.
The easiest approach is to start with creating a study containing the title, sub title and registry identifiers intended for the protocol. The titles and registry identifiers will be shared between the subparts as a single protocol can only have one title and one of each registry identifiers.
# Add first part/main study
A new study is created in studies/Study List by using the + button (add button) 
Add titles and registry identifiers as applicable
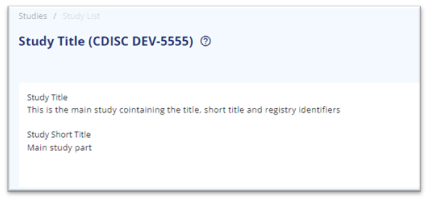
Figure 1 Titles added to 'main' study for output to protocol
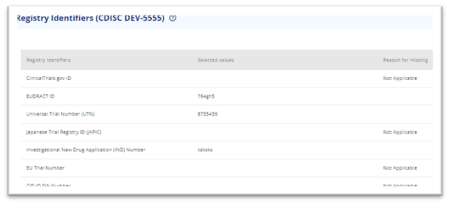
Figure 2 Registry identifiers added to 'main' study for output to protocol
# Create/add subpart
Once the initial part is created, the subparts can be created. This is done in Manage Study/Study/Study Subparts
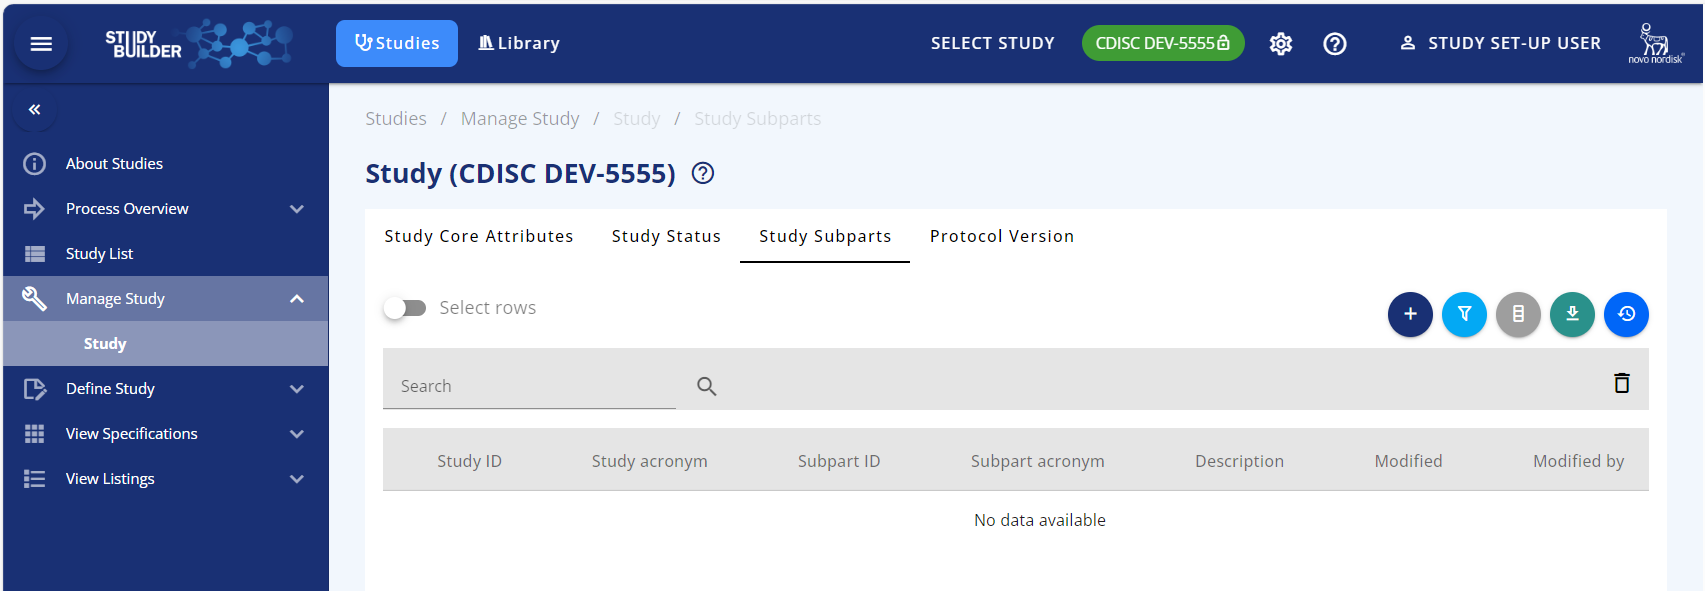
Figure 3 Study subparts are added from Studies/Manage study/Study/study Subparts
In the study Subparts tab, click the + button (add button) where 2 actions become available:
- Create new study to be study subpart
- Add existing study as study subpart
# Option: Create new study to be study subpart to the study already selected
This option is to create a new study as a subpart. Make sure to have the study selected for which the study subpart should be added
- Select ‘Create new study to be study subpart’
- Select ‘continue’
- Write study subpart acronym (could be Multi Dose, or part 2 or something else, this field is required)
- Write study acronym (this is the basic acronym for the study similar to the acronym for normal studies, the field is optional)
- Write a description (optional)
- Press ‘Save’
The study subpart is now created. Note that the study subpart has been provided a subpart ID and a Subpart acronym.
In the study List, both the initial (first) part and the new subpart will be available for selection and editing.
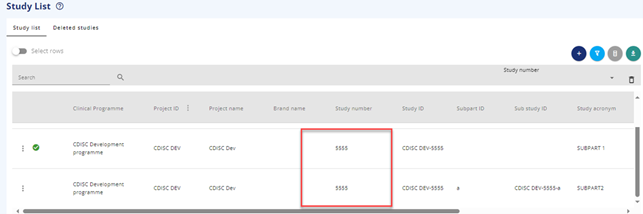
Figure 4 Main study and subpart a in the Study List
When looking into the title page and the registry identifiers, then they are inherited from the main part and not writeable.
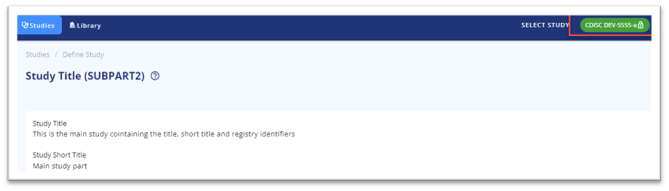
Figure 5 Titles and registry identifiers are inherited

Figure 6 Impact of creating a new study subpart
Almost all other content besides titles, registry identifiers (and study structure) can be copied from the original part by using the ‘Copy from study’ or the ‘Select from studies’ functionality, if needed.
# Option: Add existing study as study subpart
If an existing study should be added as study subpart to another study, then this option should be used. Make sure to have the study selected for which the existing study should be added as subpart.
Only studies within same project ID can be add as subpart to the ‘main’ study
- Select ‘Add existing study as study subpart’
- Select ‘continue’
- Select existing study by using the copy button

- Write study subpart acronym (could be Multi Dose, or part 2 or something else, this field is required)
- Write a description (optional) or reuse any existing description
- Press ‘Save’
The existing study will have the study number overwritten with the number from the ‘main’ study.
Example: Study CDISC DEV-5555 has been build with title and content. The project agrees to add the existing and fully described study CDISC DEV-6666 as subpart to CDISC DEV-5555. When this is done, the title and registry identifiers from CDISC DEV-5555 is inherited to CDISC DEV-6666, which is now CDISC DEV-5555-a.
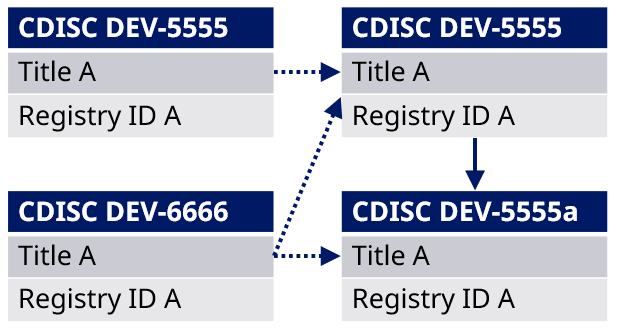
Figure 7 Impact of adding an existing study as a study subpart to another study
# Overview of study subparts
In Manage study/Study/Study Subparts it is possible to get an overview of the study with subparts
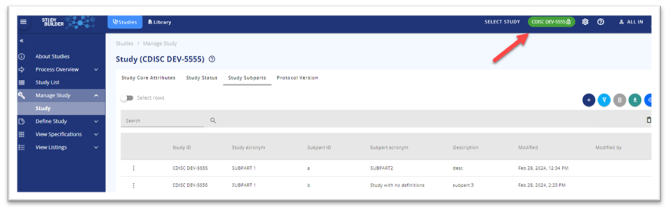
Figure 8 The main study in the topbar and subparts in the table
The ‘main study’ carrying the title and registry identifiers must be selected in the Study List
Then go to Manage study/Study/Study Subparts to get the overview – see Figure 8
| Column | Explanation | Example |
|---|---|---|
| Study ID | The study ID number including project ID | CDISC DEV-5555 |
| Study Acronym | The acronym for the whole study | DEFINE6 |
| Subpart ID | The unique ID for the subpart | a |
| Subpart acronym | An acronym that describes the subpart | SD/Single Dose |
| Description | Free text description as needed | Lorem ipsum etc |
# Releasing and locking study subparts
A study subpart cannot be released or locked individually - a subpart can only be released or locked together with the parent study. This ensures a multiple parts study always is versioned as a bundle of a parent study and its subparts.
See more on study versioning.